I always need tags for Christmas, but never seem to have any when it comes time to wrap presents. I thought I’d get ahead of the game and buy (and make!) the Joy of Giving Tag Kit.
My mom was visiting, so she brought a kit so we could make it together. We now have 30 tags waiting to be put onto presents!
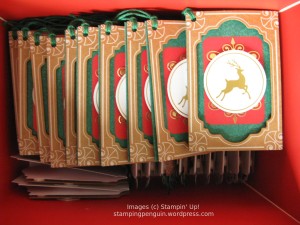
Here are samples of the three designs.

I would say, allow for at least 4 hours to put your kit together, depending upon your “crafting speed”. It is best to do things in stages to get all of the pieces ready, then assemble:
- Stamp all tags, but double and triple check the pictures to make sure you are doing it right. After you stamp your first one, compare it to the pictures again. There are extra flags (the white pieces), but not the craft pieces. My “NICE” tag is actually upside down from the sample pictures. 🙂
- Cut your twine for all tags to the suggested length (I think it was 9 inches). I had a little bit extra.
- Stack the die cuts, where possible, and break apart as a stack. Not only will you have more pieces done in one shot, but manipulating them as a stack helps support each piece.
- Add dimensionals and glue dots to the pieces, as appropriate.
Now, all you have to do is make a pile with the supplies for each design, and start assembling.
ONE LAST TIP:
Before adding the gold foil curlique stickers, I suggest removing the excess gold foil from the backing. This will leave behind just the pieces you need (plus a few small bits), making it MUCH MUCH easier to remove the stickers from the backing. Because they are intricate and laser cut, the stickers will resist pulling away from the negative pieces, unless you remove the negative pieces first. Also, if just the stickers are on the backing sheet, you can bend the backing sheet away from the sticker, rather than the other way around (which is what happened to me before removing the excess foil).
I used a piercing tool to pick up the stickers along the “arrows”. This also allowed me to line them up more easily. (Just don’t look too closely, because I couldn’t get two on the same tag to point in the same direction…)
Sorry, I didn’t think to take a picture of the stickers as I was using them. I have the leftovers to show what I mean:
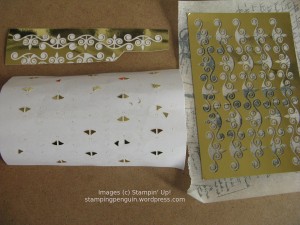
At top left, is what the remainder would look like if you try to take the stickers off the sheets without any prep.
The right shows the excess removed from one sheet (and saved onto release paper). I recommend taking it off from the side, rather from the top / bottom (from the sides of the rows). Once you get it going, it will pull away without too much effort.
The bottom left shows the backing sheet and the small bits left with the curlique stickers after removing the excess.
